A Hat Trick of Completed Cross-Stitch Projects

I got on a cross-stitch kick!

The embarrassing thing about cross-stitch is how long it can take you to do something pretty small and it’s challenging due to the teensy stitching.

I was browsing Etsy, as one does, and came across a cross-stitch pattern for this chicken pattern, which looked easy and fun to make. It was on sale so I snatched it up, but mostly because an inside joke I have with my spouse is that whenever one of us says, “Guess what?” the other person responds, “Chicken butt.”

teehee!

The best part was I had all of the materials already in my drawers. I was able to do a really decent match for the called upon colors and I think it turned out great. This took me roughly eight hours total, so I had it finished within a couple of days. I ultimately ended up framing it, which meant I had to go and pick out a frame, steam the fabric, and fit it in there. Worth it!

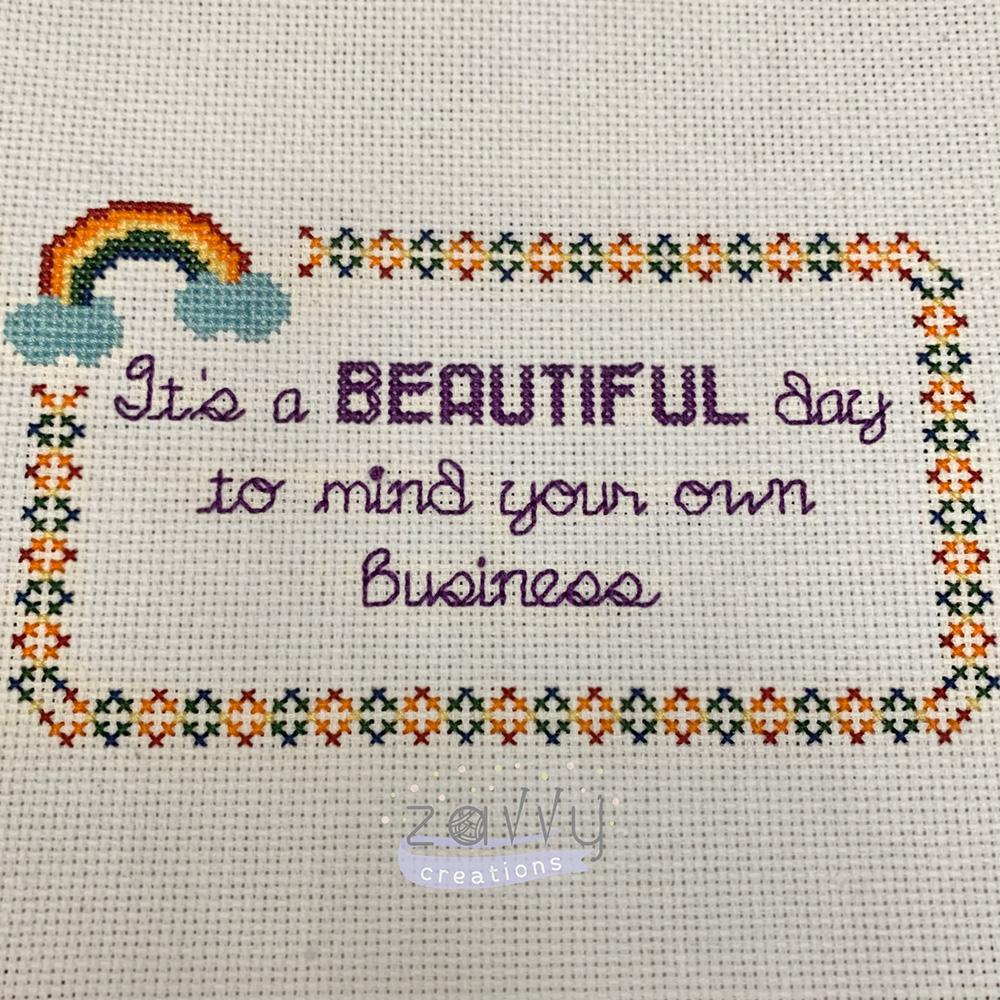
Feeling a high from the completion of a WIP so quickly, I turned to a cross-stitch pattern I began literally years ago and hadn’t finished due to the tedium of doing the border. I decided to pick it up, dust it off, and finish the border, now that I was on a roll. I am so glad I did because I had this pattern custom designed just for me. At one point I was going to put it in my cube at work but now I work from my home, so I get to look at it as a healthy reminder. (●’◡’●) I need to get a shadow box for it, but for now, this is how it looks. If you’re looking for a custom design, try The Pin and Needle.

Lastly, a friend of mine who has been known to throw around the fact that home is no place for wearing pants inspired me to cobble together my own design for her, based on alphabets and stitch pattern components I had on hand. I cut another square of Aida fabric and got to work. I did the lettering first and decided on what to put between/around it second. When I found the silly looking panda (who is pantsless), I thought it was absolutely perfect. And voila, a purple pantsless panda emerged! I also steamed and framed this one and am super stoked to give it to my friend as a gift. (Fonts and filigree courtesy of Subversive Cross Stitch.)

This thing cracks me up!

Once I completed three projects back to back over the course of a week, I had finally scratched the itch and I have turned my attention back to knitting and crochet. Until the next time, friends.

Llama Rama Ding Dong

Over the summer, I had a request to do a custom llama – white with some black included, based on a photo.

This animal is a challenge for several reasons, one of which is the abundance of llama patterns out there. I ultimately settled on one where the emphasis was not on sewing a bunch of limbs together, and the final shape was a very obvious llama.

My only challenge with this pattern is that you have to turn it inside out before seaming it up the back, and then you quickly have to stuff all the limbs before moving forward. It’s unconventional but I will credit the designer with a pattern that works well in the end. The llama stands up on its own and is really cute.

Due to the success of the first one, I received another order for a pink one to send to a family member who’d just had a baby girl. This one was a bit easier because it was all in one color and it turned out great!

I finished this amigurumi in October and I have taken a little break since then. I am gearing up again since the holiday season is on top of us (where did this year go?) and I would like to get a few things accomplished that are holiday-oriented. (Remember this post from last year?)

Cute photos below!

Chevron Convert

IMG_2202 zvc
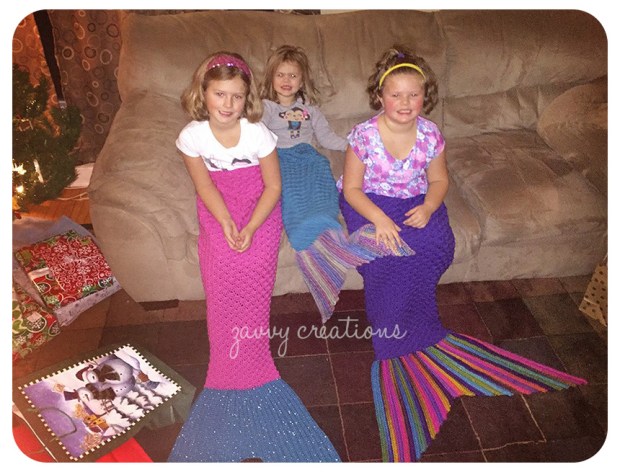
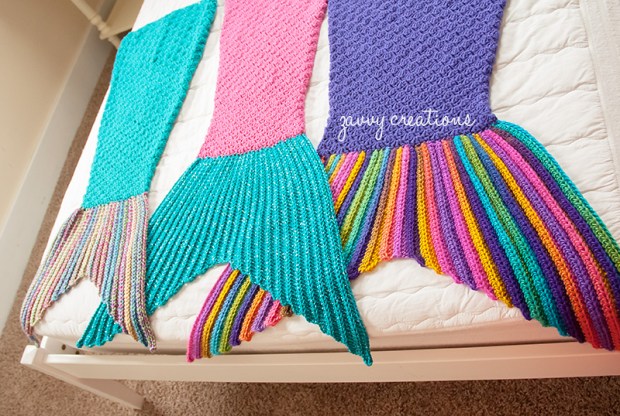
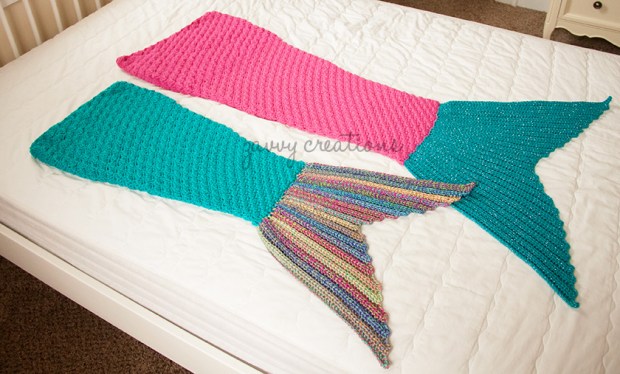
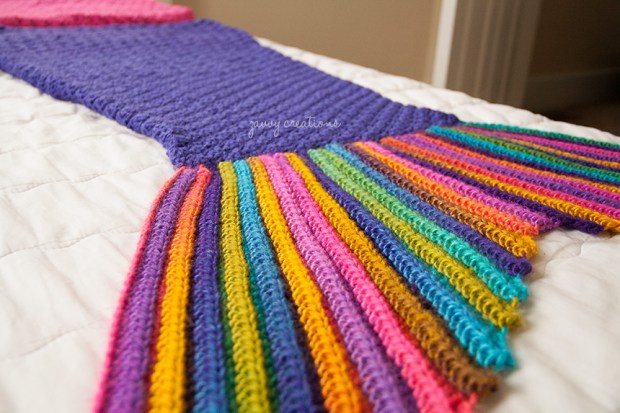
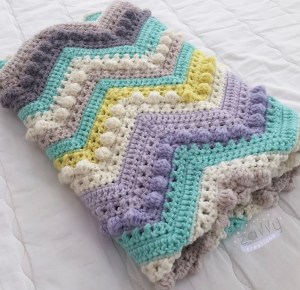
When chevron was blowing up a few years ago, I didn’t get into the trend right away. But after I tackled a couple of projects that used it, I really liked the look of it, colors depending.

Last year, Jeanne from The Crochet Crowd designed this chevron “hugs and kisses” blanket using Caron Baby Cakes. I liked it as soon as I saw it. My transfixed inner voice said, “I must make the thing.”

It took me longer to complete than I would have liked, but largely that was due to my getting sidetracked with orders, work, and other life goings-on. It is not a difficult pattern.

For my blanket, I decided to blend two different colorways, Dreamy Mint and Frosted Pansies. I wanted a pop of yellow in there to break up the teal, grays, lavender, and cream. I liked working with this yarn, for the most part, but it can split at times. It is very soft and warm, though, and I like how easy it is to wash and dry it.

I found this project relatively soothing to create, although I had to keep careful track of my rows, since it the pattern repeat consists of 8 rows. For the bobble stitches, I switched from my usual comfortable Clover hook to my Furls Odyssey hook, which has a nice long neck, ideal for working with a fluffier, thicker yarn such as this one for bobble stitches. Because you alternate with something different each time, it keeps you on your toes. It is not dull or mindless to complete.

I ended up not using all four cakes, since I did not chain as many initial stitches, opting to make something slightly smaller than the pattern calls for. (I believe it calls for 6 cakes.) Because I didn’t want the blanket to be overly taller than it is wide, I stopped with the cream color of the fourth cake. I had enough to do a single crochet border in cream around the entire blanket, which gives it a nice finished look. My blanket is roughly 31″ wide and 36″ tall.

I didn’t have an intended recipient for this blanket, so I’ve listed it in my Etsy shop. It’s largely neutral and I think the colors pop so nicely with the chevron pattern. Jeanne did such a nice job with the design.

Have you tried your hand at this one?


Handsome Fancy Goldfish

For one our Christmas exchanges, I made our nephew a fancy goldfish. He has an aquarium and just loves his fish but it’s a bit hard to cuddle them when you can’t take them out of the water.

I went with the standard orange color for my goldfish, and using a pattern I found on Ravelry from Kate Wood, I went to work. (By the way, have I mentioned this pattern is free?)

I used Knit Picks Brava Worsted yarn in Orange and clear eyes I happened to have in my eyes stash (that thought made me laugh). Although the tail/fins get a bit tedious, it’s worth it in the end for the overall look. I did make two tail fins, as suggested by the pattern designer, and she was right that it gives a fuller look, while also supporting the fish.

You can see a couple of the in-progress photos in my goldfish project on Ravelry — but here is the final little guy below. I was extremely careful in placing the side fins, so as to keep them symmetrical with the eyes. The clear eyes really give the fish a more authentic feel, I think.

Isn’t he so handsome? You just want to pick him up and snuggle him, which was the whole point. He was a hit and it made me really happy to be able to do that for our sweet nephew.

Fancy Goldfish_zvc

You could make these in just about any color under the sun and the project page shows a few in different stripey versions, too. I think I will definitely be making more of these.

If you have made any or try this pattern based on my endorsement, I’d love to hear how it goes!

Latent Mermaid Tail Photos

I kept my promise to myself and took photos of the completed mermaid tail blankets with my DSLR, so I have a few more pictures to share. I was quite pleased with how these turned out and I’m told the girls they were intended for love them.

steele-girls_zvc

img_1718

img_1693

img_1703

img_1679

img_1697

img_1683

img_1724

img_1712

*Note: I don’t know why some of the photos appear blurrier in WordPress except that they are larger than they appear, and so downsizing them causes the blurriness.

A Tail of Procrastination (Three, Really)

When I was “commissioned” to make three mermaid tail blankets for some friends’ daughters, I thought I would have had them completed by summertime.

Fast forward to November 8, and I have finished just one and am rounding the bend on the second. It isn’t that they’re very difficult to make, but that I worked on completing other projects before even thinking of starting on them. Then a whole bunch of stressful stuff happened in my family life between June and September (almost no crocheting took place), and then the ticking clock prompted me to get cracking. These are intended as Christmas gifts, so it’s definitely go time.

To that end, I figured a good way to keep me accountable would be to post my progress as I went along.

I definitely plan to take better photos when all is said and done, so bear with me with the phone pics!

The first one I finished is for the youngest daughter in peacock blue with a multi-colored fin:

9333-zv

The second one I’m working on for the oldest girl is in a hot pink color (Hot Rose from Hobby Lobby’s “I Love This Yarn”) and it will have a Peacock Metallic fin.

pink

I’ve actually begun the fin, just don’t have an updated photo, since I would prefer to post it when it’s completed.

Only one more tail to finish after the hot pink one (in purple!) — goal is to finish all by the end of the month.

More progress to come!

Edit as of November 14: mermaid tail #2 is complete! On to number three!

img_9382

As of December 6, 2016, these babies are in the can! Woo!

tail

Finished Orders from DioneDesign Patterns

There are a few “go to” amigurumi designers I keep at the top of the list when I receive custom orders and need to find that perfect animal for a baby shower gift.

One of those designers is DioneDesign, who has a shop on Etsy. She has a fabulous array of animals and does a terrific job of using increases and decreases to achieve specific shapes that make her animals more lifelike (her hippo is one of them and I have made countless of these).

My two most recently completed orders were requests for the triceratops and the bear (sans flower) from Dione. I was a little nervous about the triceratops because it is a more advanced, sewing-heavy project, but I was ready to roll up my sleeves and try it–it was just too cute not to go for it.

I don’t make a lot of bears, teddy or otherwise, so I was hoping that my experience with Dione’s patterns would carry me through the execution. I was not disappointed.

I took my time with both of these projects, as they were larger and more detailed, and particularly when there is a lot of sewing or you’re going for a specific look that the design calls for, exercising patience wins the day.

In the end, I was thrilled with how both of these turned out. Keep in mind, there are so many factors as to why dolls turn out how they do in each particular crocheter’s hand, be it tension, the type of yarn, placement and/or size of eyes, etc.

My tweaks were using slightly smaller eyes on the dinosaur and not putting spots on its back (I liked the blue body on its own), and then not adding eyebrows or paw lines on the bear. Just my personal artistic style.

If you have been making amigurumi for a while and want a fun (and slightly challenging!) animal to try, I highly recommend finding something in Dione’s shop. If you are also a fan and have made some things, I’d love to hear from you!


Triceratops profile


Triceratops from the back


Dino with Cupcake


Bear Amigurumi - Seated


Bear Amigurumi Seated 2


Bear with Balloons