Dipping My Toe in to the Baby Yoda Craze

I’m finally able to peek out and post a completed project after a couple of really crazy months, and I’m not even talking about the pandemic. I hope each of you are doing well and staying safe and healthy. What a scary time this is with so much unknown. On to the post…

Firstly, a confession: I have never been able to get into Star Wars. I know it’s one of the biggest movie franchises of all time and has a lot of merit. For whatever reason, it just never spoke to me, although that’s not to say I can’t appreciate aspects of it, and certainly some of the characters.

After The Mandalorian came out and it was revealed there was a Baby Yoda character, I “Awww!”ed at it just like the rest of the globe, even without any context. I waited a pretty long while, comparatively speaking, but finally decided to try my hand at making an amigurumi doll. I have at least one friend who is obsessed and when I started out, I knew I would ultimately give her the doll if it turned out decently.

Fortunately, it did!

I started this little guy back in February and due to all sorts of craziness in life, I was only able to pick it up and work on it a teeny part at a time. Mid-April, I forced myself to figure out the coat and finish it so I could give it to my friend (curbside drop-off with proper distancing, no less).

I did end up tailoring the coat to fit my doll the way I wanted it to–I did not end up doing the folded down collar for the coat that the pattern will yield. There are more detailed dolls and patterns out there but for an initial project, certainly, but all in all, this free pattern from Bee Friends Crochet works really well for anyone who just wants to dip their toe in, as I did.

If you want to see the in-progress photos, you can go to my Instagram page where I have a saved highlight in Stories of the doll coming together.

My favorite details about the doll are the eyelids (chained 6 for the upper and another 6 for the lower and carefully sewed them on) and giving the doll a bit of fuzz on top of the head for a bit more authenticity. That’s why you’ll see a close-up of the top of his sweet little head.

After I posted the photos of the doll on social media, I had a few friends ask me to make them one, so now I have three going at one time. (I do not have this available in the shop at this time.) I know I will burn out after a while but for now, the Baby Yoda Machine is in full swing!

Are you a fan of Star Wars? Or just along for the ride on the Baby Yoda bandwagon like I am?


Sweet Little Tree of Mine

Happy holidays, everyone! I know not everyone celebrates Christmas or is into Christmas trees, but if you are, this is the post for you!

I finally delved into my pattern trio from Lalylala (Lydia Tresselt) and made the Christmas tree (the other two are angel and candle)! It’s amazing how when I buy patterns, I have every intention of making the item RIGHT NOW and it rarely ever happens. Timing is important when it comes to crafting, it seems.

Anyhow, I decided I would make up a little tree for my office’s holiday gift exchange and thought it would be festive and cheery enough that most people would like it, whoever ended up with it.

I’ve made enough amigurumi that the actual doll itself didn’t take too long – a handful of hours. The sewing of the beads with invisible thread was the task that took a lot of patience. Thankfully, if you do it while you’re watching holiday movies or something, it doesn’t feel like a chore. So I would say this pattern is advanced beginner, depending on your sewing skills. Of course you don’t have to sew anything onto it. The tree itself is adorable as is.

Here’s my first little tree doll — I bought more beads so I can make more of these cuties. Makers, have you tried this pattern yet?

Happy holidays to you, whatever you celebrate! (Or don’t! Merry Whatever!)

Milla Mouse + Shop Update!

Hi, folks!

I’m really proud of today’s amigurumi reveal. The designer, My Krissie Dolls, is very thorough with her patterns, as you can see from a previous doll I made of hers. I worked on this doll off and on for about two months and I’m really happy I took my time.

What I loved about this pattern–and what was most challenging–was that you are given an option to knit the dress and collar or do it in crochet. Because I wanted to challenge myself with the knitting, in addition to preferring the overall look, I opted to knit them. However, I did not want to make something flat and have to seam it, so I used magic loop. I also used worsted weight yarn, whereas the designer calls for sock weight yarn. I prefer my finished dolls to be more sizable and huggable. 🙂

The other options for this doll include shaping the toes and adding some kind of blush or rouge for added color and dimension to the face and ears. I did not tack on eyelashes or make the teddy bear for Milla, but those are all details you can decide on if you take on this pattern.

First up, some photos. Then an update on the shop below!

Now that you’ve surely fallen in love with this mouse doll as I did, there’s good news on that front. She is for sale!

Not only is she for sale but she’s listed on the new shop page! You’ll see in the main menu links above that there is now a “Shop” link, which I will be keeping updated with what I have in stock and ready to go. Shipping is free within the domestic U.S. but if you are an international shopper, you’ll need to message me beforehand so we can square up the final details in a separate listing.

I’m not ready to take custom orders the way I did on Etsy but I imagine I’ll get there. Speaking of Etsy, I still have the shop and a handful of listings there but ultimately, I will only be keeping it up to let people know to head this way. The bottom line is, as much as I love Etsy and continue to support other artists there, it’s not good for small hobbyists like myself who are selling infrequently. The costs have gone up way too much. At the end of the day, I pay a not-so-cheap annual fee to have this website and it would benefit me (and any buyers) to sell directly from a website I already pay for and use, versus having to charge more for all of the fees Etsy takes out now. I didn’t imagine I would even have an Etsy shop for over five years, so I consider it a really good run.

Questions or comments? Email me at zavvycreations[at]gmail[dot]com or leave me a comment on this post!

A Cute Raccoon and an Update on Etsy

Hello, friends!

It’s been longer than I would prefer between updates. Life was pretty hectic for a while and the blog took a longer snooze than I thought it would.

I finished a custom raccoon order back in March and things were so busy at work, I didn’t have time to process the photos I took or blog about it. So now I’m posting the update on that. I was a bit worried that because I hadn’t done a raccoon in a few years, I would find the pattern overly technically challenging, but I was pleased to find it wasn’t. The most challenging aspects of making it were:

  • The color changes on the snout — getting nice, even tension with the changes
  • Placement of the eyes and eye patches and getting everything just so with the symmetry
  • Making sure to stuff properly but not overstuff; the head and body needed a lot for proper shaping!
  • All the sewing

via GIPHY

In the end, though, the pattern and my skills prevailed, and I was just as in love with this raccoon doll as I was when I made the first one. If you’d like to try your hand at this pattern, you can find it in Little Muggles’s shop.

Speaking of Etsy shops…

Between January and July of this year, Etsy has made some pretty significant changes to their platform. There are definitely some pros to what they’re doing for mega sellers. For smaller shops like mine, I’m afraid the overhead costs of having an Etsy shop are proving to be too much. I haven’t officially decided to close my shop because having the potential buyers on such an enormous platform is definitely worth some of the expenses. (Operative words: potential and some.)

Due to the changes Etsy made, I saw a SIGNIFICANT decrease in sales. I was getting the visits, largely due to Pinterest (I’ll save a rant on Pinterest for another time), but almost zero sale conversions. It wasn’t just me. I took to the forums to see if others were experiencing the same frustrations and they are.

I work hard to price my items fairly for my time and quality materials. I am definitely not someone who has all the time in the world to make a bunch of amigurumi and sell them at a discounted price. Nor am I selling at craft fairs. (Maybe someday.) I was also still using promoted listings at $1 a day to get my items in front of buyers. However, even dropping $30-35 a month on promoted listings, I have barely been able to sell anything, and I’m spending that money with zero guarantees that more sales will be forthcoming. On top of out-of-pocket costs, Etsy changed how they bill sellers and are taking a little extra chunk out of the total sales, as well.

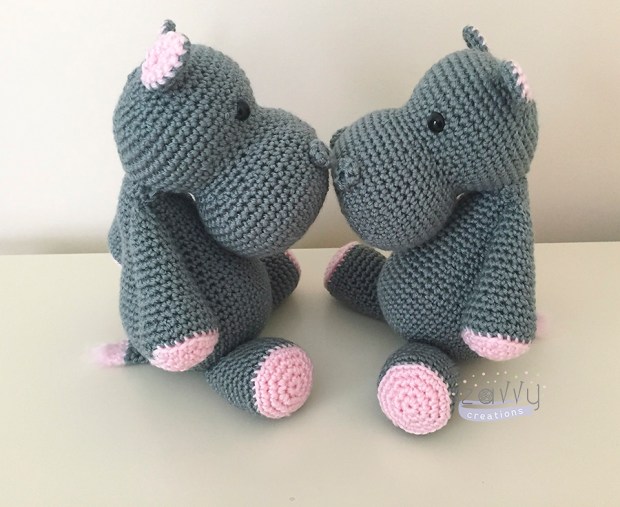
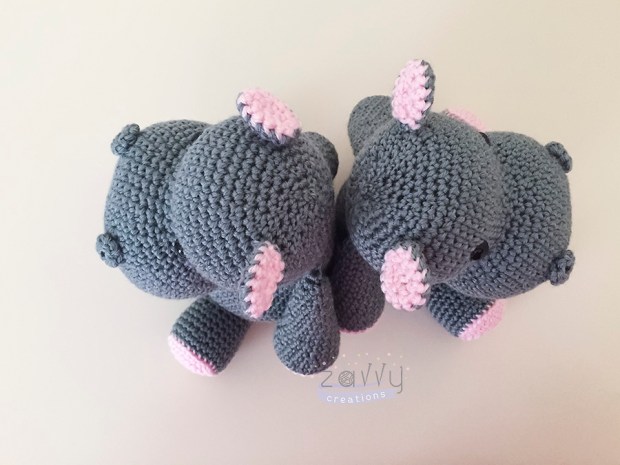
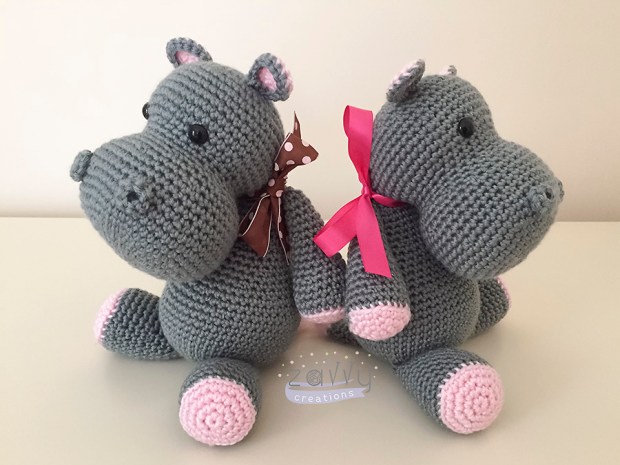
The most recent change in the last few weeks is that Etsy has updated their algorithm to favor listings with free shipping. Honestly, I get it. I do. Everybody loves free shipping. But all that means for small-potatoes shops like mine is that we have to include the shipping cost into the price of the item, which makes the items seem overpriced, and I’m not sure free shipping is going to be the clincher to get a sale. If I were to tell someone that the hippos I sell are $45, they might say, “Okay, a bit pricey but seems worth it for a quality handmade toy.” (By far my most popular one.) But when I say they’re $54, I picture eyebrows winging up and a much faster decision being reached that that’s far too much. At least when I was listing shipping fees separately, a buyer could see that I did my best to keep them at $10 or under, and it was because I ship Priority Mail and with insurance.

I’m pondering over all of these changes and wondering what the best route for me to take is. I have had my Etsy shop for five years now and for the most part, it’s been really great. I have enjoyed the process, I’ve really liked having a wee side business that earns some extra spending money, which mostly helped me repurchase supplies for new listings, and I’ve evolved as a crafter and honed some more business skills. But with these latest changes, I feel as if my shop is being swallowed up unless I am willing to invest much more money up front, which I don’t have. If I were churning out items left and right, that would be one thing.

At the end of the day, having this shop is primarily supposed to be for fun. Crocheting and knitting are FUN hobbies for me. I don’t want to equate those activities with the drag of Etsy’s new policies or being a strain on my personal finances.

So what I’ve done in the meantime is keep a handful–and I mean handful–of listings active. I also have the “Request Custom Orders” turned on because anybody can go through my prior sales and figure out what kind of work I do and request something to be made. The listings that are available have free shipping but their prices look higher.

I’ve turned off priority listings, which means I’m not shelling out $35 a month for the potential of a sale. Not having as many listings also gives me time to make items in my own time and list them for sale as they become available. One of the options I have been considering is letting all of my listings expire and doing a shop restock when I get 5-10 items made. I’ve also considered selling items only through this website, which I am able to do, but I don’t have the audience, and purchasing options are more limited (e.g. only being able to take PayPal).

If you are an Etsy shop owner or if you are someone who shops on Etsy, and in particular if you’ve ever purchased something from me, I would love to get your feedback. I have found posts from people I follow on Instagram and the like, voicing similar frustrations, with some people actively shutting down their shops altogether. I’m still open…just…but need to figure out a way to make my craft hobby work for me without being subject to these large monkey wrenches.

For now, I’m knitting and crocheting at a leisurely pace and trying my hand at things I haven’t had the time for and I’m enjoying it. I hope you are all enjoying a lovely summer!

Update: this is how the current fee structure breaks down for any given sale in 2019. It adds up to almost 9%, which is not a small chunk, in my opinion: “Etsy charges $0.20 for listing fee, 5% transaction fee, and 3 % + $0.25 payment processing fee.”


Llama Rama Ding Dong

Over the summer, I had a request to do a custom llama – white with some black included, based on a photo.

This animal is a challenge for several reasons, one of which is the abundance of llama patterns out there. I ultimately settled on one where the emphasis was not on sewing a bunch of limbs together, and the final shape was a very obvious llama.

My only challenge with this pattern is that you have to turn it inside out before seaming it up the back, and then you quickly have to stuff all the limbs before moving forward. It’s unconventional but I will credit the designer with a pattern that works well in the end. The llama stands up on its own and is really cute.

Due to the success of the first one, I received another order for a pink one to send to a family member who’d just had a baby girl. This one was a bit easier because it was all in one color and it turned out great!

I finished this amigurumi in October and I have taken a little break since then. I am gearing up again since the holiday season is on top of us (where did this year go?) and I would like to get a few things accomplished that are holiday-oriented. (Remember this post from last year?)

Cute photos below!

Challenges with Color Changes

Late last year, I had two back-to-back orders for baby penguins. Due to the holidays and typical year-end madness, I didn’t get around to doing a post about either of them.

In previous renditions when doing the color changes in the head (white eye areas on a dark gray/light black background), I have kept my two colors of yarn going simultaneously, but I have had mixed results with the color changes looking loose in the end product.

I made an executive decision as a woman who takes pride in her handcrafted goods. I changed things up by snipping one of the colors for each round (the white in the head) and tying secure knots with the loose ends. I found this to be much more successful in keeping the stitches tight (as color changes can produce looser or sloppier looking stitches), not to mention not wasting a lot of yarn carrying tails back and forth around the head. In the end, the dolls looked polished and professional, and I didn’t have to worry about a stray end coming loose if the doll ends up in the hands of a careless child or pet.

Finished penguin with tight color changes

Fast forward to the present moment. In one of the crochet groups I am in on Facebook, someone posted this blog article, where the author wrote about doing more seamless color changes in amigurumi.

I gave it a try the next time I worked on a doll (this time, a giraffe) — and I am pleased to say it is a successful technique!

Giraffe with new color changes technique used

As you can see from the photo, where the color change happens when you’re working in the round (without a join), the jog isn’t as noticeable. Check out the horns. It doesn’t glare out at you and you don’t get the “zig-zag” effect. Sometimes the zig-zag looks okay for a particular effect but for the most part, it looks nicer when it can be avoided.

Even my husband, who doesn’t notice much of what I’m doing with crochet most of the time since I’m always working on something, thought the this color-change technique was noticeable and one to keep using.

There are a couple of key points I discovered: slip stitching loosely is important, or the piece will look slightly shrunken on that round. If you’re going for the shrunken effect, slip stitch more tightly. The other point is to make sure there are enough rounds between the color changes that aren’t doing a lot of increasing or decreasing. In fact, it is ideal to change colors when there is another round of one single crochet stitch in each stitch around.

Lastly, the slip stitch round + doing the next round in the back loops with single crochet = one round. Knowing that helps with counting your rounds, since you’ll see the two horizontal lines next to one another. See photo below:

If I’m not mistaken, the blog post I linked to above has gone viral in the crochet world, because I have seen the “big time” crochet designers doing their own posts showcasing their successes with it.

Have you tried this out? What do you think?


Pattern Overview: Robot from Amigurumi Today

I received a request to make a couple of little toys for two small boys who were going to be traveling. They had their own unique interests so I worked with the client to try and find patterns that would sync up to their particulate tastes.

For one little boy, I made a butterfly, the pattern of which is from Theresa’s Crochet Shop. She designs “affordable cuteness” and is very talented. For my version, I added a little sparkly white color for the inside of the wing and used a teal color for the rest of the butterfly. S/he turned out super cute! I’m really happy with this pattern, despite the vast amount of hand sewing involved, and will make more.

This slideshow requires JavaScript.


When it came time to find a good robot pattern, I landed on this free one from Amigurumi Today:

Image courtesy of Amigurumi Today

I really had to work to get the head just right, because when working in continuous rounds and making a square shape, you’re actually creating a parallelogram, so it’s pretty slanted and not a decisively straight-edged square.

Image courtesy of Twisted Turns Rebooted

Because this is whimsical and for a little boy, I didn’t think he would mind, but the perfectionist in me was struggling a bit. I used a 3.5mm hook and light worsted weight yarn so the stitches would be nice and tight. Between the head, the face, and embroidering, those alone took a couple of evenings.


The head is oversized compared to the body. When I sewed the body to the bottom of the head, it looked centered in the front and completely wonky in the back; something I had to live with. Here’s the back:

By the time I got to the arms and legs and got them sewed on, the doll looked less crooked. But there is definitely a reason you don’t see the back of the doll on the pattern page. 😉

Ultimately, I made a couple of variations to my doll that strayed from the pattern but nothing major. I would probably make another of these if I could figure out some better techniques for embroidering the face. While I know how to cross stitch, embroidering faces onto a crochet canvas is not something I’ve completely mastered.

Skill level: experienced intermediate | Pattern rating: B+

Here’s my very sleepy looking robot doll — or maybe he’s rebooting?

Without the bottom legs, the robot isn’t really taller than the butterfly!

What’s Better Than One Hippo? Two Hippos!

I’ve had a rash of hippo-making recently. A very generous client fell in love with the hippos I make and ordered one, then two, and then another set of two hippos so she could have a pair in stock for the numerous people in her lives who are having babies.

I admit, I understand the obsession. This pattern is terrific (designed by Dione Design) and I quite enjoy making them. They remain my most popular item for sale to date.

If you or someone you know loves hippos, feel free to ping me on this site or in the shop for customization — I have done these in all kinds of color combinations! The pink and gray are the classic and most requested colors.

On to the photos! 🙂


Completed: Sepp the Seahorse Doll from Lalylala

Hi, friends.

I believe a little while ago I mentioned that I had finally completed the seahorse doll (pattern from Lalylala), which took me the better part of two years to make, but only because I put him down for long periods of time.

At last, I processed a few of the photos I managed to get before I shipped off the doll(s) to their new home. I didn’t get any really terrific shots with my nice camera because I was under deadline to finish it as a gift for a new baby back in January.

I heard that the family did love the seahorses, as their theme for their baby son’s nursery was the ocean.

Success!

A relative had given me a bunch of shiny Bernat baby yarn a few years back and when the seahorse project came up, I decided I would use it to create a shimmery look. It worked out very well for this purpose, but because the yarn is thin and crinkly, there were times I almost gave up making the doll with this yarn.

On top of the difficulty of working with the yarn is the fact that Lalylala designs her patterns with tons of details for the maker. I would think I was nearing the end and I realized I had to do the fins and details for the body. Those took me much longer than I anticipated because doing surface slip stitch with teeny thin yarn that splits easily is not exactly fun.

Regardless, I plowed through, and I am really pleased with the overall result. If you’re on Ravelry, you can see the project details here. Despite using much finer yarn, this doll was huge at 14″ tall.

I think I could do another one of these dolls but probably not as a custom order, since it’s difficult to predict how long it will take me to finish it. But I could see myself making another and listing it in the shop someday.

Here are the photos! Whee!

IMG_1170_zvc

IMG_1173_zvc


Geoffrey Giraffe, Because Cutesy Alliteration

I’m skipping ahead to show one of my recently finished creations, because I haven’t yet processed all the photos from my finished Lalylala seahorse doll, first mentioned way back in this post.

(But let me just put in a parenthetical, “Whoopee!” for that thing being finished.)

It had been a while since I had an occasion to make a giraffe — I think it had been over a year when I made this one and had it delivered early (on Valentine’s Day, no less!) to an Etsy customer.

This giraffe pattern is from Little Muggles, one of the earliest designers of amigurumi I found when I first delved into this animal-making journey. I have purchased a plethora of her patterns, and she frequently has at least one new pattern in the Zoomigurumi books. Come to think of it, the next Zoomigurumi book that is coming out will be featuring a mallard pattern from Little Muggles that I have been dying to make when she debuted it on Facebook.

All that is to say, her giraffe pattern is a stellar one, and I have enjoyed making the few I that I have. Usually I stick with the bright yellow version, as pictured below, though I have made alternate colors previously.

For the most recent one, I decided to mix things up with the colors of the horns and spots being different than the color of the hooves, and I think it was a successful choice.

Without further ado, here is my version of Stanley the Giraffe, whom I’ve dubbed Geoffrey, simply because I like alliteration.

❤ ❤ ❤

Geoffrey 1Geoffrey 2Geoffrey 3